


The Anatomy of a Dental Instrument: From Handle to Working Tip

The Anatomy of a Dental Instrument: Understanding Components from Handle to Working Tip for Precision and Ergonomics
Dental instrument anatomy describes the structural parts—handle, shank, and working end—that determine an instrument’s function, ergonomics, and clinical precision. Understanding these components helps clinicians select the right tool for access, adaptation, and patient safety while reducing clinician fatigue and enhancing outcomes. This article explains each major part, how geometry and materials influence performance, and what to look for when choosing instruments for restorative, periodontal, endodontic, and surgical tasks. After grounding the terminology and mechanics, we examine handle ergonomics, shank geometry, working-end variations, material science with an emphasis on medical-grade German stainless steel, and how precision manufacturing and compliance affect consistency and longevity. Lenox Instruments, a provider of premium surgical and dental instruments made from medical-grade German stainless steel and compliant with ISO 13485 and Health Canada MDEL, is mentioned where it supports procurement and quality context. Read on for practical selection guidance, comparison tables, and actionable tips to match instrument anatomy to clinical needs.
What Are the Main Parts of a Dental Instrument? An Overview of Handle, Shank, and Working End
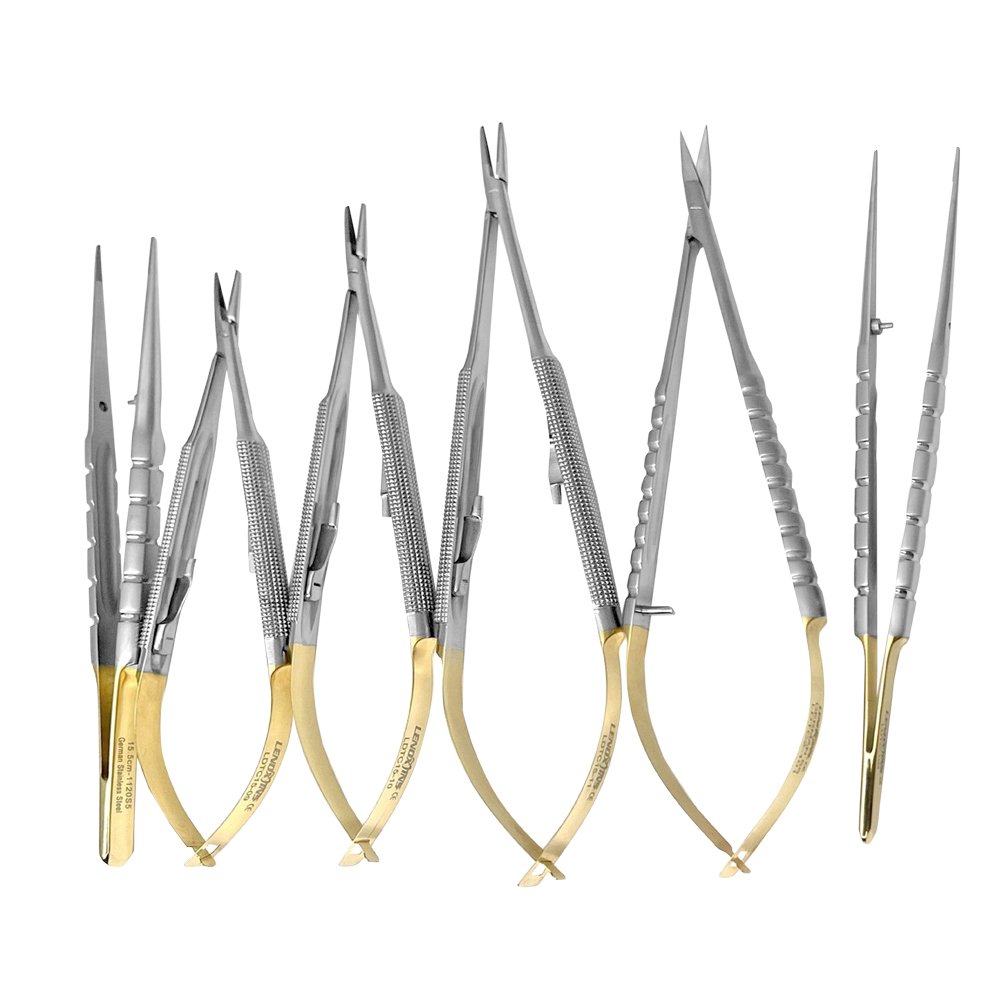
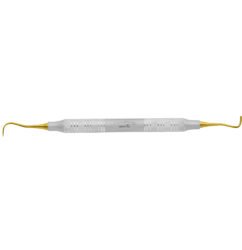
A dental instrument is conventionally composed of three primary parts: the handle for control, the shank for reach and angulation, and the working end for task-specific action; these three parts work together to deliver clinical precision and ergonomics. The handle translates clinician force and tactile feedback; the shank positions the working end relative to oral anatomy; the working end performs cutting, scaling, probing, or manipulation tasks. Clear vocabulary around these parts matters for instrument selection, sharpening, and adaptation to clinical scenarios. The section below gives a quick definition and an itemized list to capture the canonical structure and to serve featured-snippet queries.
The three canonical parts of a dental instrument are:
- Handle: The grip portion that transmits tactile sensation and torque control.
- Shank: The segment that orients and reaches the working end into the mouth.
- Working end: The blade, tip, toe, or nib that performs the clinical task.
Knowing these parts allows clinicians to match instrument geometry to procedural requirements, which then leads into a closer look at how each part contributes to function and control.
How Does Each Part Contribute to Instrument Function and Control?
The handle primarily controls grip, torque, and tactile feedback, enabling precise motion and force modulation during procedures. A properly sized handle reduces gripping force and improves fine motor control, which directly influences clinical outcomes like conservative tooth preparation or careful subgingival scaling. The shank governs access and angulation; its length and bends determine whether the working end can reach posterior teeth or subgingival pockets while maintaining the correct working angle. The working end executes the clinical action—sharp cutting edges remove calculus, while blunt tips probe without traumatizing tissue—so its micro-geometry determines efficiency, safety, and maintenance needs. Understanding these functional relationships prepares clinicians to evaluate handle ergonomics next.
What Are Common Terms and Synonyms for Dental Instrument Components?
Terminology for instrument parts varies across specialties and manufacturers, so a concise glossary aids consistent communication in procurement and clinical use. Common synonyms include working end = tip, blade, toe, or nib; shank = stem or neck in some contexts; handle = grip or barrel. Manufacturers and catalogs often use product-family names (e.g., Gracey curette) that implicitly reference working-end shape and shank angulation, so translating product names into component geometry helps clinicians choose appropriate tools. Clear naming also simplifies maintenance instructions—sharpen the cutting edge, not the toe—and supports matching instruments to tasks such as supragingival scaling versus restorative excavation. With terminology clarified, the next section examines how handle design drives ergonomics and professional comfort.
How Are Dental Instrument Handles Designed for Ergonomics and Professional Comfort?
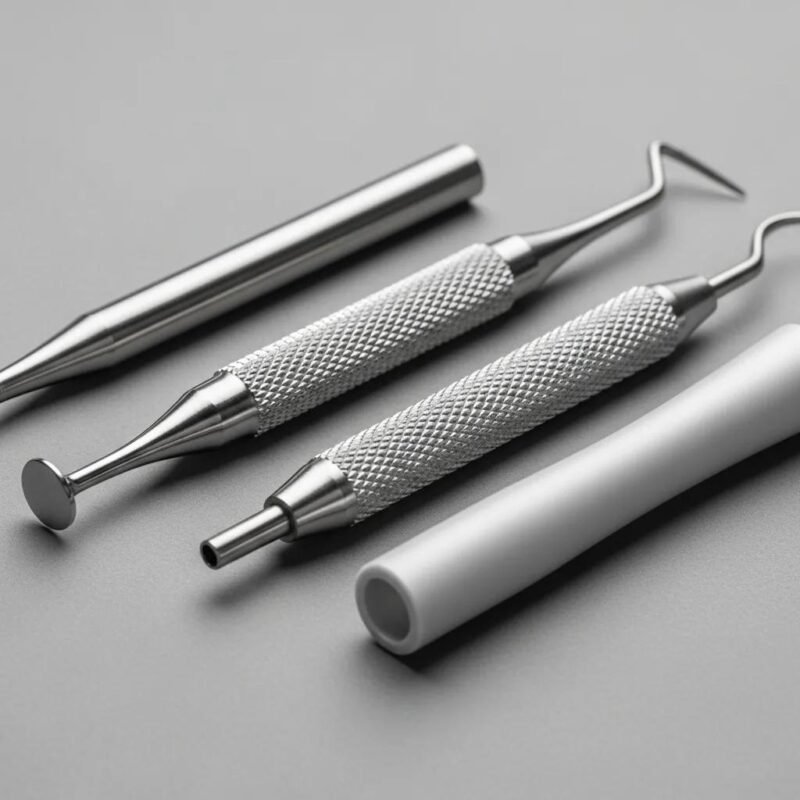
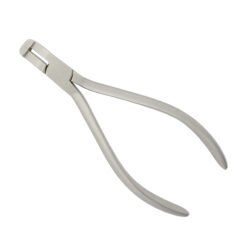
Handle design balances diameter, weight, texture, and material to optimize grip, reduce muscular strain, and preserve tactile sensitivity during lengthy procedures. A well-designed handle increases contact area, lowers pinch force, and improves torque control, which collectively reduce clinician fatigue and improve procedural precision. Manufacturers vary handle cross-sections (round, hexagonal, oval) and incorporate surface treatments (knurling, grooves) or add sleeves to modify grip characteristics; each choice affects sterilization and durability. Below we compare common handle types and their ergonomic attributes in an EAV table to support quick selection decisions.
Common handle types and ergonomic attributes are summarized here:
| Handle Type | Diameter / Material | Texture |
|---|---|---|
| Thin round | 6–7 mm / stainless steel | Smooth or light knurling |
| Standard barrel | 8–10 mm / medical-grade stainless steel | Pronounced knurling or nurling |
| Lightweight hollow | 7–8 mm / hollow stainless steel | Fine knurling or silicone sleeve |
What Materials and Grip Textures Enhance Handle Performance?
Materials and textures determine tactile feedback, sterilization compatibility, and long-term wear characteristics for handles used in clinical practice. Medical-grade stainless steel offers durability and compatibility with high-temperature autoclaving, while silicone sleeves add immediate comfort and slip resistance but require validated sterilization protocols; each material choice presents trade-offs between grip and maintenance. Surface textures such as knurling or nurling create micro-profiles that increase coefficient of friction when hands are gloved, improving control during wet procedures, and they also concentrate tactile cues that enhance fine motor adjustments. Selecting the right combination requires weighing grip performance against sterilization workflow and instrument lifecycle, which leads into how handle design reduces clinician fatigue and improves precision.
How Does Handle Design Reduce Clinician Fatigue and Improve Precision?
Ergonomic handle design reduces the muscular effort required to stabilize instruments, thereby lowering the risk of musculoskeletal disorders and sustaining fine motor control over long clinical sessions. Increasing handle diameter up to an optimal point redistributes force across larger hand surface area, decreasing pinch force and associated fatigue; balance and weight distribution further influence wrist posture and micro-movements. Tactile textures and material finishes help maintain consistent grip without excessive force, which preserves tactile sensitivity and precision during delicate procedures like root instrumentation or margin finishing. Considering these ergonomic principles supports better clinician outcomes and prepares the clinician to select shank geometries that complement handle performance for specific access needs.
What Is the Role of the Shank in Dental Instruments? Functional and Terminal Shank Explained
The shank links handle to working end and defines reach, angulation, and mechanical leverage—its geometry directly controls access to anterior versus posterior teeth and supragingival versus subgingival zones. Functional shank refers to the portion between the handle and the working end that provides the necessary bends and length for clinical access; terminal shank is the final straight segment adjacent to the working end that sets the blade’s orientation relative to the tooth. Recognizing these distinctions helps clinicians select instruments with the right combination of shank length and angulation for targeted tasks, and the table below maps common shank types to typical uses.
| Shank Type | Length / Angulation | Intended Use |
|---|---|---|
| Short, straight | Short / 0–15° | Anterior access, direct visualization |
| Medium, angled | Medium / 30–45° | Premolar/posterior crowns, supragingival scaling |
| Long, multi-bend | Long / 45–90° | Subgingival posterior access, deep pockets |
How Do Shank Length and Angulation Affect Access and Adaptation?
Shank length and angulation determine both the approach path and the working angle at the tooth surface, influencing whether the clinician can adapt the working end effectively without straining the wrist or contorting the instrument. Longer shanks permit access to posterior and subgingival sites but can reduce tactile feedback and require more wrist stabilization; conversely, shorter shanks improve control in anterior regions but may obstruct reach. Angulation creates the necessary offset for blind areas; for example, a 45° bend often provides the correct blade-to-tooth approach for subgingival scaling while preserving a neutral wrist posture. Clinicians must therefore balance reach, tactile sensitivity, and ergonomic posture when choosing shank geometry, which leads into a direct comparison of functional and terminal shanks.
What Are the Differences Between Functional Shank and Terminal Shank?
Functional shank and terminal shank are distinct yet complementary: the functional shank includes bends and length that permit access and leverage across the mouth, while the terminal shank is the short, usually straight segment that positions the working end at the precise angle required for cutting or adaptation. The functional shank determines gross positioning and reach, whereas the terminal shank fine-tunes the blade orientation for effective stroke mechanics. For example, scalers often feature a functional shank with multiple bends for posterior reach, and curettes have a terminal shank that sets the toe orientation for subgingival debridement. Recognizing these roles helps clinicians match instrument families—scalers, curettes, explorers—to clinical tasks efficiently and safely.
How Do Working Ends Vary Among Dental Instruments? Exploring Blades, Tips, and Nibs
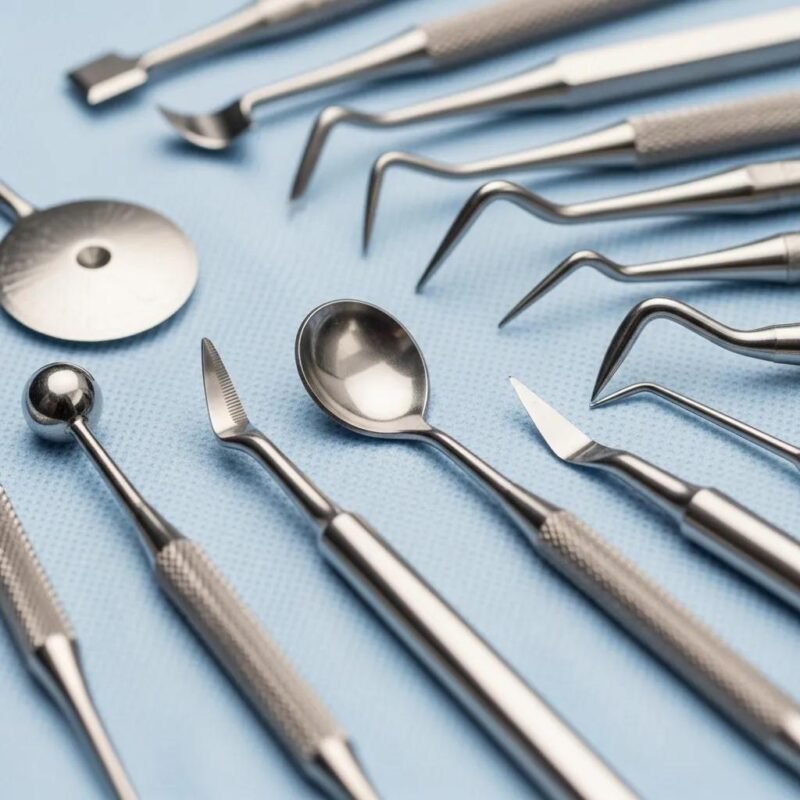
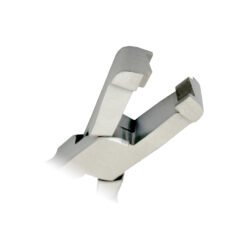
Working ends are categorized by the action they perform—cutting edges, non-cutting tips, toes, blades, and nibs—and their microgeometry defines efficiency, tissue interaction, and maintenance needs. Cutting edges have defined bevels and angles for calculus removal or restorative cutting, while toes and rounded ends provide atraumatic contact for probing and curettage. Instrument families such as scalers, curettes, excavators, and explorers each adopt specific working-end geometries that match clinical objectives like supragingival scaling, fine root planing, caries removal, or tactile exploration. The following list highlights major working-end families and typical clinical uses to help clinicians choose suitable instruments.
Working-end families and typical uses include:
- Cutting edges (scalers, excavators): remove hard deposits or carious tissue with sharp bevels.
- Blades with toes (curettes): adapt to root anatomy for subgingival debridement with rounded tips.
- Non-cutting tips (explorers, probes): detect irregularities and measure pocket depth without cutting.
What Are the Specific Features of Cutting and Non-Cutting Working Ends?
Cutting working ends feature a fine bevel with a defined angle and a sharpened edge that delivers shearing force to remove calculus or carious material; edge thickness, bevel angle, and surface finish influence cutting efficiency and ease of sharpening. Non-cutting ends—rounded toes or blunt nibs—provide atraumatic contact for tissue assessment, probing, or repositioning without laceration, and they preserve soft tissue integrity when used correctly. Maintenance differs: cutting edges require periodic honing and careful stropping to retain sharpness, whereas non-cutting tips need inspection for deformation or blunting that can reduce tactile sensitivity. Understanding these distinctions supports proper maintenance strategies and informs instrument selection for procedures that balance efficiency and safety.
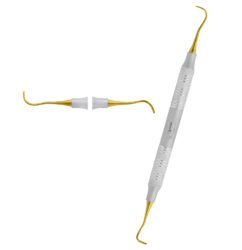
How Do Working End Designs Relate to Instrument Types Like Scalers and Curettes?
Design features of working ends directly map to instrument families: scalers have triangular cross-section cutting edges for supragingival calculus removal, curettes combine a rounded toe with a single or double cutting edge for safe subgingival scaling, and excavators present spoon-shaped blades for caries removal. These shape-to-task relationships ensure the right contact geometry—scalers concentrate force on a thin cutting edge, while curettes distribute force across a rounded toe to minimize tissue trauma. Choosing between instruments therefore depends on target tissue, required access, and the need for atraumatic versus aggressive material removal. With working-end choices clarified, material science and stainless steel properties become crucial for durability and sterilization performance, which we discuss next.
Why Is Material Science Critical in Dental Instrument Anatomy? The German Stainless Steel Advantage
Material choice determines corrosion resistance, hardness, passivation quality, and biocompatibility—properties that affect edge retention, sterilization longevity, and surface finish, all of which influence clinical reliability. Medical-grade German stainless steel is widely regarded for its combination of high corrosion resistance, consistent hardness allowing fine edge geometry, and superior finishability, which together support long instrument life and repeated autoclave cycles. Instruments produced from such alloys maintain sharpness, resist pitting, and allow precise machining of shanks and working ends, which benefits clinicians who require consistent performance. The table below contrasts key material properties to guide procurement and selection decisions.
| Material | Property | Value |
|---|---|---|
| Medical-grade German stainless steel | Corrosion resistance | High (passivation-grade finish) |
| Standard surgical stainless steel | Hardness | Moderate (good for general use) |
| Coated alloys | Surface finish durability | Variable (may affect sharpening) |
What Properties Make Medical-Grade German Stainless Steel Ideal for Dental Tools?
Medical-grade German stainless steel offers a balance of tensile strength, controlled hardness, and a surface chemistry that accepts passivation treatments to form a protective oxide layer; these factors reduce corrosion risk and preserve polished finishes. Its machinability enables precise edge profiles and consistent shank bends, which are essential for reproducible working angles and adaptation. The alloy’s capacity to hold a fine edge reduces sharpening frequency and maintains cutting efficiency across repeated sterilization cycles. These material attributes translate into predictable clinical performance, lower long-term maintenance, and clearer procurement specifications for practitioners evaluating instrument catalogs.
How Does Material Choice Impact Durability, Sterilization, and Performance?
Material selection affects lifecycle costs through differences in wear resistance, compatibility with high-temperature sterilization, and tendency to corrode or pit under repeated autoclave cycles. Instruments made from high-quality medical stainless steels withstand autoclaving and chemical disinfectants with minimal change to surface finish or edge geometry, whereas lower-grade metals may show accelerated dulling or surface degradation. Buyers should consider not only initial sharpness but also expected retention of geometry after hundreds of sterilization cycles to assess long-term value. With material impacts clear, the final major consideration is how precision manufacturing and quality control ensure instruments meet design specifications—particularly via certifications and controlled processes.
How Does Precision Manufacturing and Quality Control Enhance Dental Instrument Anatomy?
Precision manufacturing enforces tolerances on blade angles, shank bends, and handle symmetry, producing instruments that behave consistently across a catalog and support predictable clinical techniques. Tight machining tolerances, controlled heat treatments, and validated passivation produce uniform edge retention, consistent shank geometry for reproducible access, and balanced handles for ergonomic control. Quality assurance programs and regulatory compliance provide buyers with traceability and process transparency, giving confidence in procurement decisions and inventory management. The next subsection lists the standards and certifications that commonly govern medical device production and explains their relevance to instruments.
Standards and regulatory frameworks affect manufacturing in these ways:
- Standards ensure process control and repeatability in manufacturing.
- Certifications provide external validation of quality management systems.
- Compliance improves buyer confidence by documenting traceability and regulatory oversight.
Understanding these frameworks prepares buyers to evaluate supplier claims, which leads into a factual statement about how Lenox Instruments aligns with those expectations.
What Are the Standards and Certifications Governing Dental Instrument Production?
Relevant standards and certifications focus on quality management, device traceability, and regulatory clearance; for example, ISO 13485 specifies requirements for a quality management system tailored to medical devices, emphasizing consistent product quality and risk management. Regulatory listings such as Health Canada’s Medical Device Establishment Licence (MDEL) pertain to distribution and establishment licensing, adding oversight to manufacturing and supply chain practices. These standards matter because they indicate that the manufacturer operates under controlled processes for design control, supplier qualification, and post-market surveillance—elements that directly influence instrument reliability and clinician safety. With standards in mind, the final subsection explains how Lenox Instruments applies such compliance in practice.
How Does Lenox Instruments Ensure Quality Through ISO 13485 and Health Canada MDEL Compliance?
Lenox Instruments states compliance with ISO 13485 and Health Canada MDEL, which indicates the company maintains a quality management system for medical devices and meets regulatory distribution requirements; this compliance supports traceability, controlled manufacturing, and product consistency. For clinicians and procurement teams, these credentials imply that instrument dimensions, material certificates, and sterilization compatibility are handled within an auditable framework, aiding inventory decisions and clinical risk management. Lenox’s catalog spans diagnostic, surgical, restorative, orthodontic, endodontic, and periodontal categories, and the company emphasizes medical-grade German stainless steel in its product range to align material science and manufacturing controls. For practices seeking reliable, certified instruments, reviewing supplier certifications and product specifications provides the necessary buying confidence.